How queues work
Every ticket in Ravenna belongs to a queue. Each queue can be configured with its own settings, integrations, and automation rules. You can connect queues to Slack channels, enable AI-powered responses, set up email-to-ticket conversion, and more. Queues appear in your left sidebar below the views section, making it easy to switch between different areas. Each queue maintains its own filters and view configurations.Creating a queue
1
Access queue creation
In your left sidebar below the views section, click the + button next to the queues list.
2
Configure basic settings
Choose a queue emoji for visual identification, enter a name for your queue, and set a prefix for ticket numbering. The prefix can be automatically generated from the name or customized to your preference.The prefix appears in ticket numbers (e.g.,
HELP-123) and helps users quickly identify which queue a ticket belongs to.3
Save and configure
Once created, access advanced settings by selecting your queue and clicking Settings in the top-right corner.
When you create a new workspace, Ravenna automatically creates a “Help Desk” queue to get you started. You can customize or delete this queue based on your needs.
Queue organization
Queue prefix and ticket numbering
Each queue uses its prefix to generate unique ticket identifiers. For example, a queue with prefixHELP creates tickets numbered HELP-1, HELP-2, etc. This makes it easy to identify which queue a ticket belongs to at a glance.
Prefixes must be unique within your workspace and are automatically suggested based on your queue name, though you can customize them during creation.
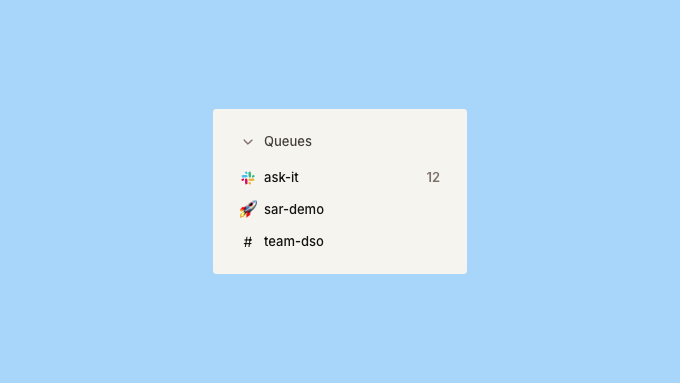
Queue visibility in sidebar
Queues appear in your sidebar navigation below views, with each queue showing its emoji and name. You can reorder queues by dragging them in the sidebar to match your team’s priorities.Moving tickets between queues
You can move tickets from one queue to another to reorganize your work or route tickets to the appropriate team. When moving tickets, you can optionally update other ticket properties like status, priority, and tags.1
Select tickets
From the ticket list, select one or more tickets to move.
2
Open move dialog
Click the Move action from the bulk actions menu or individual ticket menu.
3
Choose destination
Select the target queue and optionally update other ticket properties.
4
Confirm move
Click Move to transfer the tickets to the new queue.
Moving tickets to a new queue does not trigger auto-assignment. Use workflows to automate assignment when tickets are moved between queues.
Sharing tickets across queues
Tickets can be shared across multiple queues, allowing different teams to collaborate on the same request without duplicating work. When a ticket is shared:- The ticket appears in both the original queue and shared queues
- All team members in shared queues can view and update the ticket
- Changes made in any queue are reflected across all shared instances
- The original queue maintains ownership of the ticket
Use ticket sharing when multiple teams need visibility into the same request, and use ticket links when tickets are related but should remain separate.
Deleting queues
You can only delete a queue if it contains no tickets. If you need to remove a queue that has tickets, move those tickets to another queue first, then proceed with deletion.Queue settings
Access your queue settings by selecting a specific queue and clicking Settings in the top-right corner.Slack integration
Request channel
Request channel
Connect a Slack channel as a source of requests. When users post messages in the connected channel, they can be automatically converted into tickets in your queue.Configure how tickets are created from messages, whether to use emoji reactions for ticket creation, and how the AI responds to requests.
Learn more about request channels and Slack integration.
Ravenna AI
Ravenna AI
Enable Ravenna AI to unlock powerful automation capabilities in your Slack channel.AI responses
Configure when Ravenna should automatically respond to messages:
- All messages: Respond to every message in the channel
- Channel messages: Only respond to top-level messages (not threads)
- Off: Disable automatic responses
Slack ticketing
Slack ticketing
Control how tickets are created and managed in your Slack channels.Auto create tickets
Automatically create a ticket for all messages sent in your channel. When enabled, every message becomes a ticket without requiring emoji reactions.Ticket events
Send messages in Slack for granular ticket updates like priority changes and status updates. This keeps everyone informed about ticket progress directly in Slack.Public ticket actions
Send action buttons directly in your request channels for all users to interact with. This allows non-workspace members to take actions like assigning or resolving tickets.Public emoji actions
Allow all users to trigger Ravenna actions with emoji reactions, not just workspace members.CSATs
Send a customer satisfaction survey when tickets are resolved to gather feedback on your support quality.Silent mode
Prevent ticket mirrors from appearing in request channels. Useful when you want tickets created without cluttering the channel.System emojis
Send system emoji updates to the channel when actions are taken in a ticket, providing visual feedback about ticket status changes.
Thread messages are captured as updates to the parent ticket rather than creating new tickets.
Triage channel
Triage channel
Configure whether all tickets created in this queue should be sent to your workspace’s triage channel for centralized monitoring.When enabled, every ticket created in this queue will automatically appear in the triage channel, allowing your team to monitor all incoming requests from a single location. This is particularly useful for high-priority queues or when you want centralized oversight.
Learn more about triage channels and how to set up centralized ticket monitoring.
Email integration
Inbound email processing
Inbound email processing
Enable your queue to receive emails and automatically convert them into tickets. This allows external users to create tickets by sending emails to your queue’s dedicated address.Each queue gets a unique email address in the format:Guest users
When enabled, emails from addresses not in your Ravenna organization will automatically create guest user accounts. This is useful for external support scenarios.Sender name
Customize the sender name for outbound emails from this queue. This appears in the “From” field when Ravenna sends email notifications.Bounce emails
When enabled, Ravenna sends bounce notifications for emails that fail to process, helping you identify delivery issues.
Learn more about email integration and how to configure email-to-ticket conversion.
Email security and filtering
Email security and filtering
Control which emails are processed by your queue using allowlists. This helps prevent spam and ensures only authorized sources can create tickets.Allowlisted emails
Specify individual email addresses permitted to create tickets. Useful for restricting access to specific partners or vendors.Allowlisted domains
Specify entire domains permitted to create tickets (e.g.,
@yourcompany.com). This allows all users from trusted organizations to submit requests.If allowlists are defined, only emails from those specified sources will be processed. All other emails will be rejected.
Learn more about email integration.
Request types
Associate specific request types with your queue to help users submit structured requests. When request types are connected to a queue, they appear as options when creating tickets in that queue. This helps organize incoming tickets and can trigger automated routing and responses. Request types can also specify default queues, creating a two-way relationship that streamlines ticket creation.Learn more about request types and how to configure custom fields for structured data collection.
Auto assignee
Select users who should automatically receive tickets when they’re created in this queue. This ensures new tickets always have an owner and helps distribute workload evenly across your team. When multiple auto assignees are configured, Ravenna uses round-robin assignment to distribute tickets fairly. This prevents any single team member from being overwhelmed with new requests.Auto assignees are applied when tickets are created in the queue, not when tickets are moved to the queue. To reassign tickets when moving between queues, use workflows or manual assignment.
Knowledge base
View and manage knowledge base folders connected to your queue. When knowledge bases are connected, Ravenna AI can use this information to provide more accurate and contextual responses to tickets in the queue. Connecting relevant knowledge sources ensures AI responses are grounded in your organization’s documentation, policies, and procedures. You can connect multiple knowledge bases to a single queue for comprehensive coverage.Learn more about knowledge bases and available knowledge sources.
Intelligent ticket routing
Ravenna uses a routing system to determine which queue should receive each ticket. Understanding this hierarchy helps you configure queues and request types for optimal ticket distribution.1
Request type queue
If a request type specifies a default queue, the ticket is routed there. This takes highest priority in the routing logic.
2
Channel-connected queue
If the source Slack channel is connected to a specific queue, the ticket is routed there.
3
Default queue
The workspace’s default queue is used as a fallback when no other routing rules apply.
Set a default queue for your workspace in Settings > Workspace > General. This ensures all tickets have a destination even when routing rules don’t match.
Best practices
Start simple
Create queues that match your team structure with clear names and prefixes. Consider organizing by department, function, or service area.
Enable features gradually
Configure Slack integration, email processing, and AI features one at a time to avoid overwhelming your team.
Use auto-assignment
Ensure new tickets always have an owner by setting up auto-assignees. This prevents tickets from being overlooked.
Connect knowledge bases
Link relevant knowledge bases to improve AI response accuracy and enable intelligent deflection.
Configure routing
Set up intelligent routing with request types and default queues to ensure tickets reach the right team.
Monitor with views
Create custom views for each queue to track metrics and monitor ticket flow.