Create your first Ravenna channel and connect it to a Slack request channel to start receiving and managing tickets where your team already works.
Every ticket in Ravenna belongs to a channel. A channel has its own ticket prefix, settings, integrations, and routing rules, and it is what you connect a Slack channel to.Time: about 10 minutes.
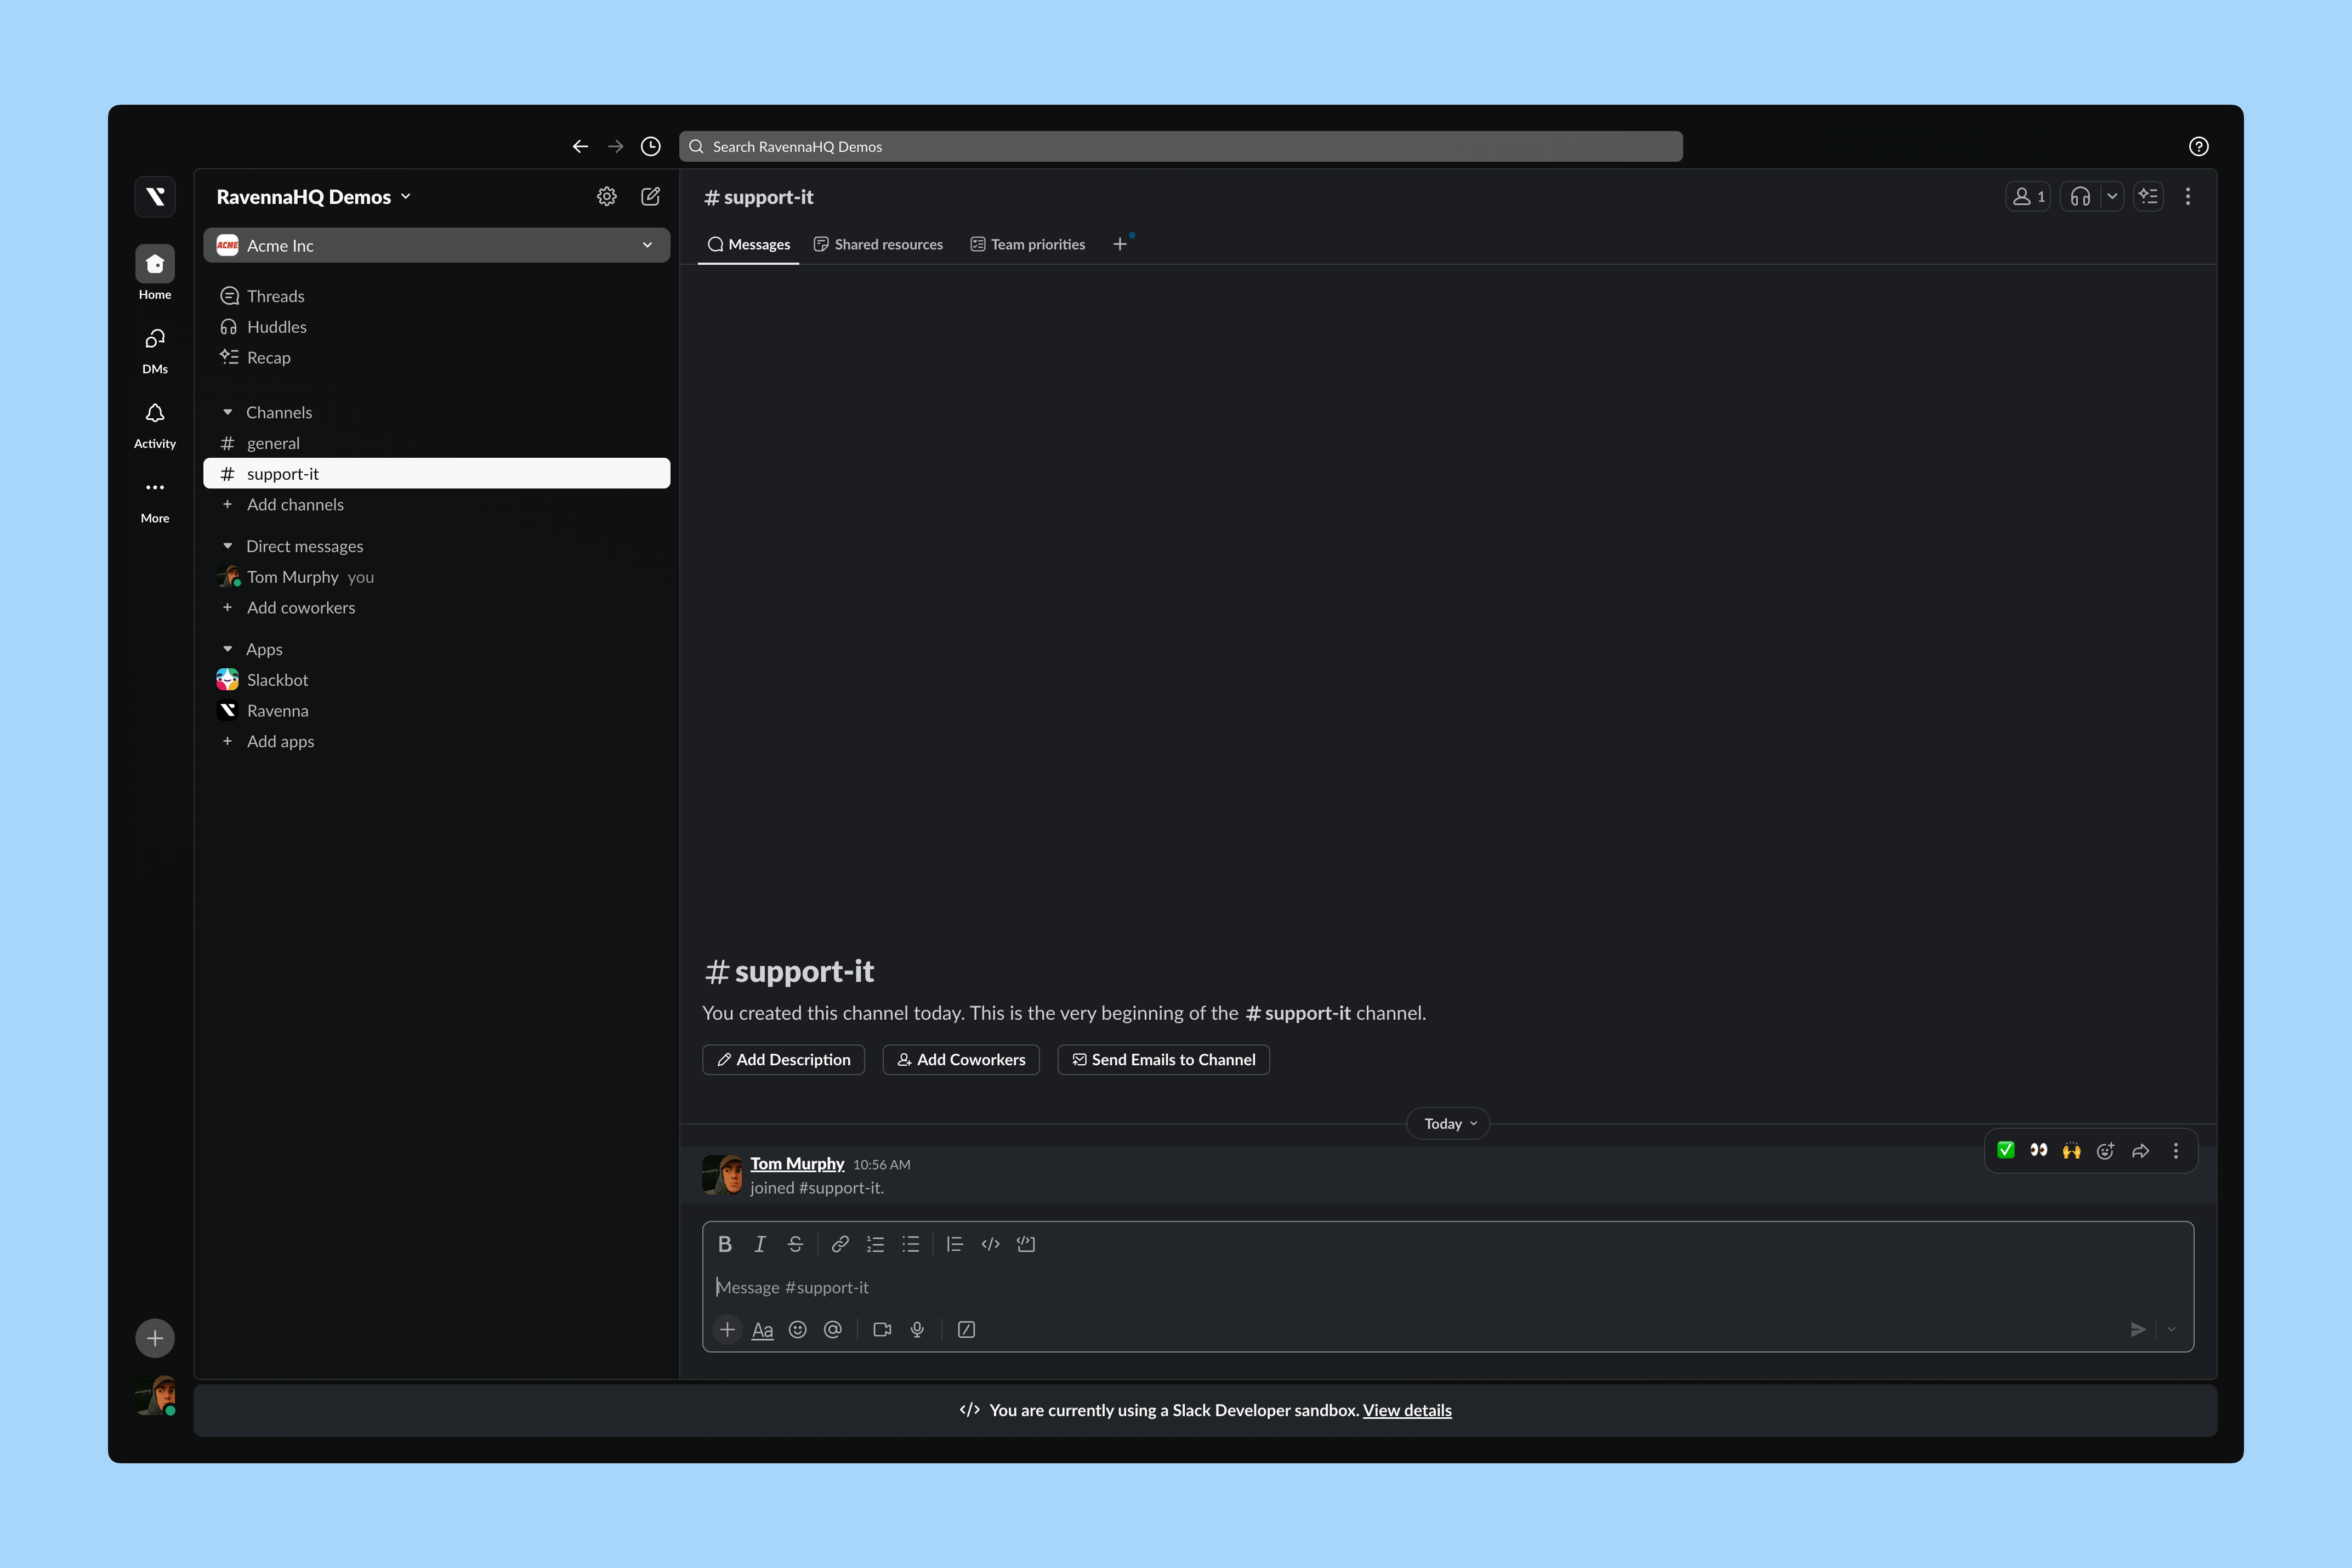
Create a public Slack channel for requests if you do not have one. This example uses the IT Operations team’s request channel, the place employees go to ask for help.
Most organizations prefix request channels so their purpose is obvious: #ask-it, #support-it, #help-people.
Interactive walkthrough
Step-by-step
1
Set up your Slack channel
2
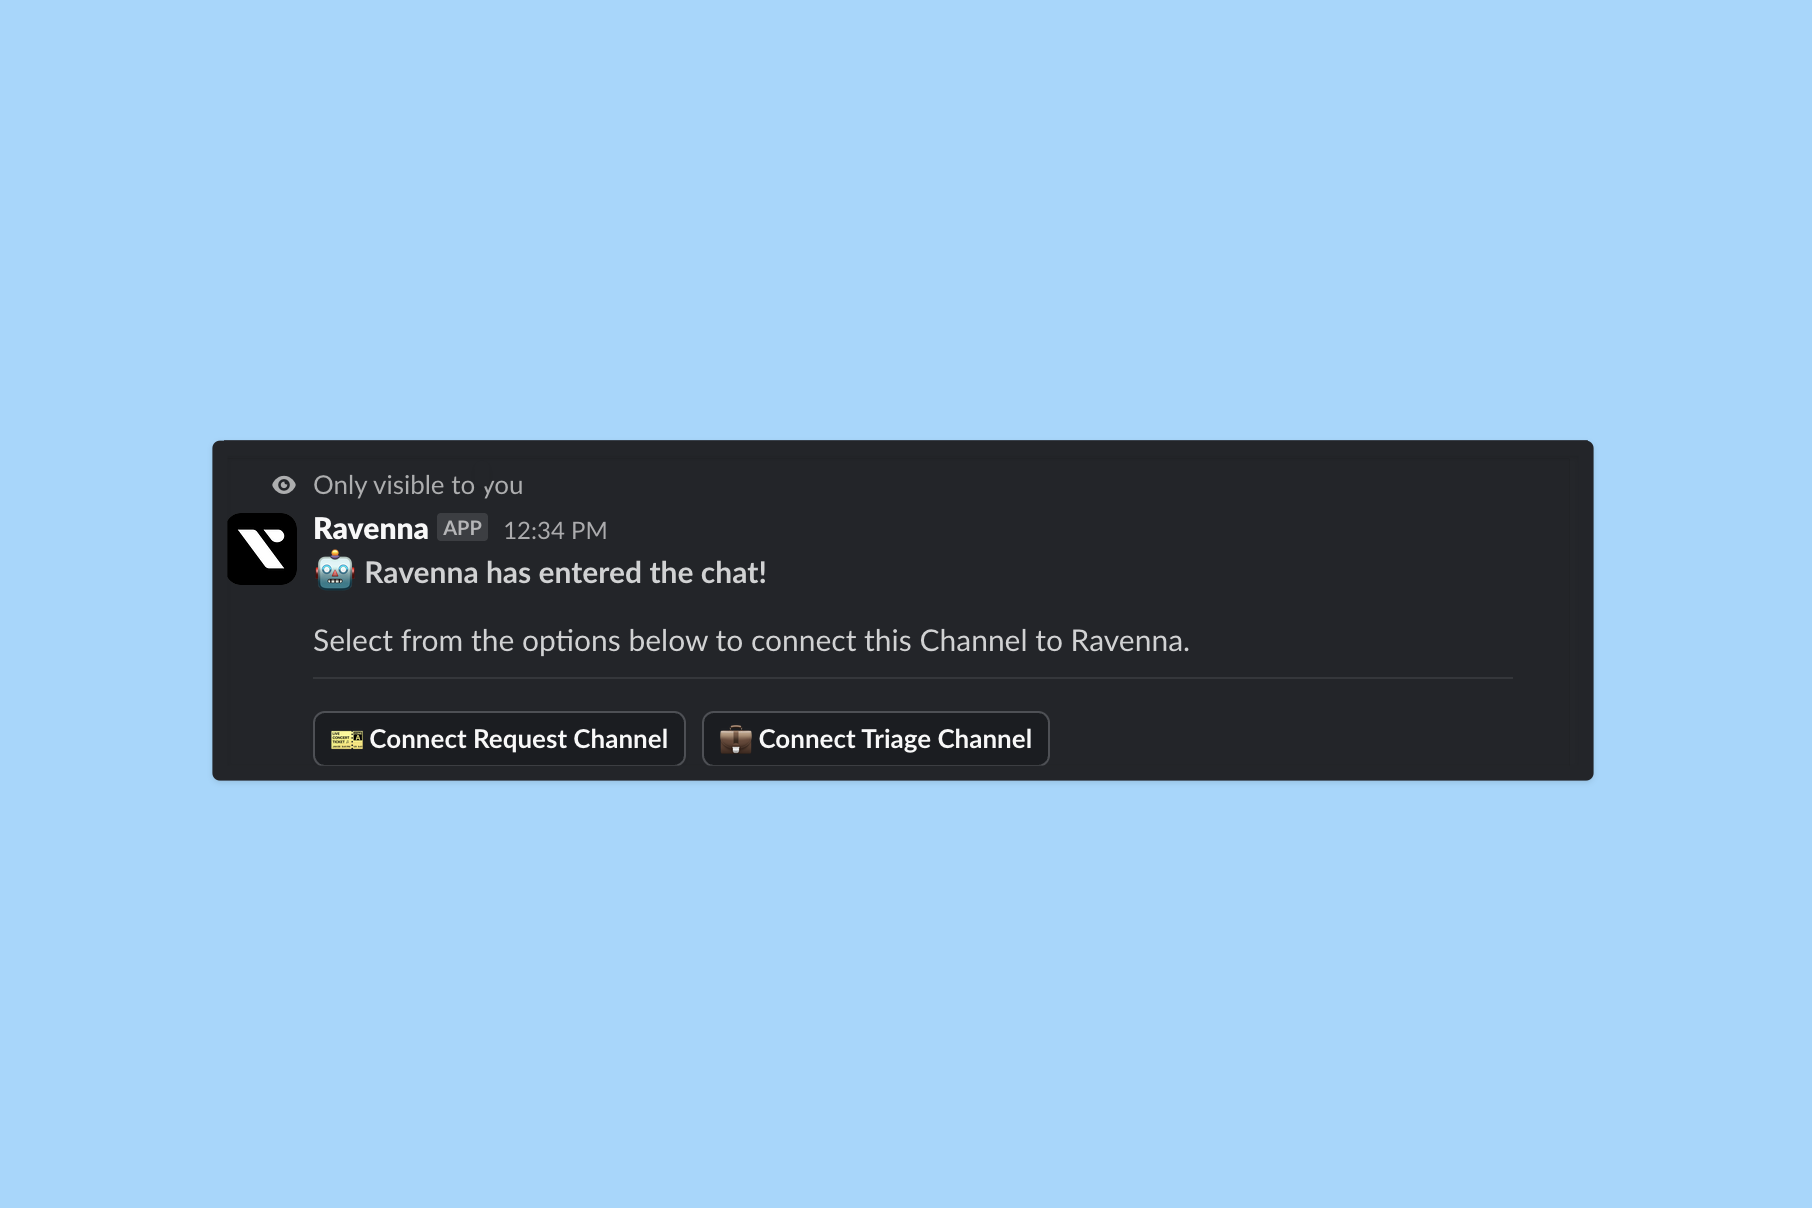
Invite Ravenna to the Slack channel
Send /invite @Ravenna in the channel.
3
Connect it as a request channel
Ravenna replies with a message only you can see. Select the workspace you created in the previous step and click Save.
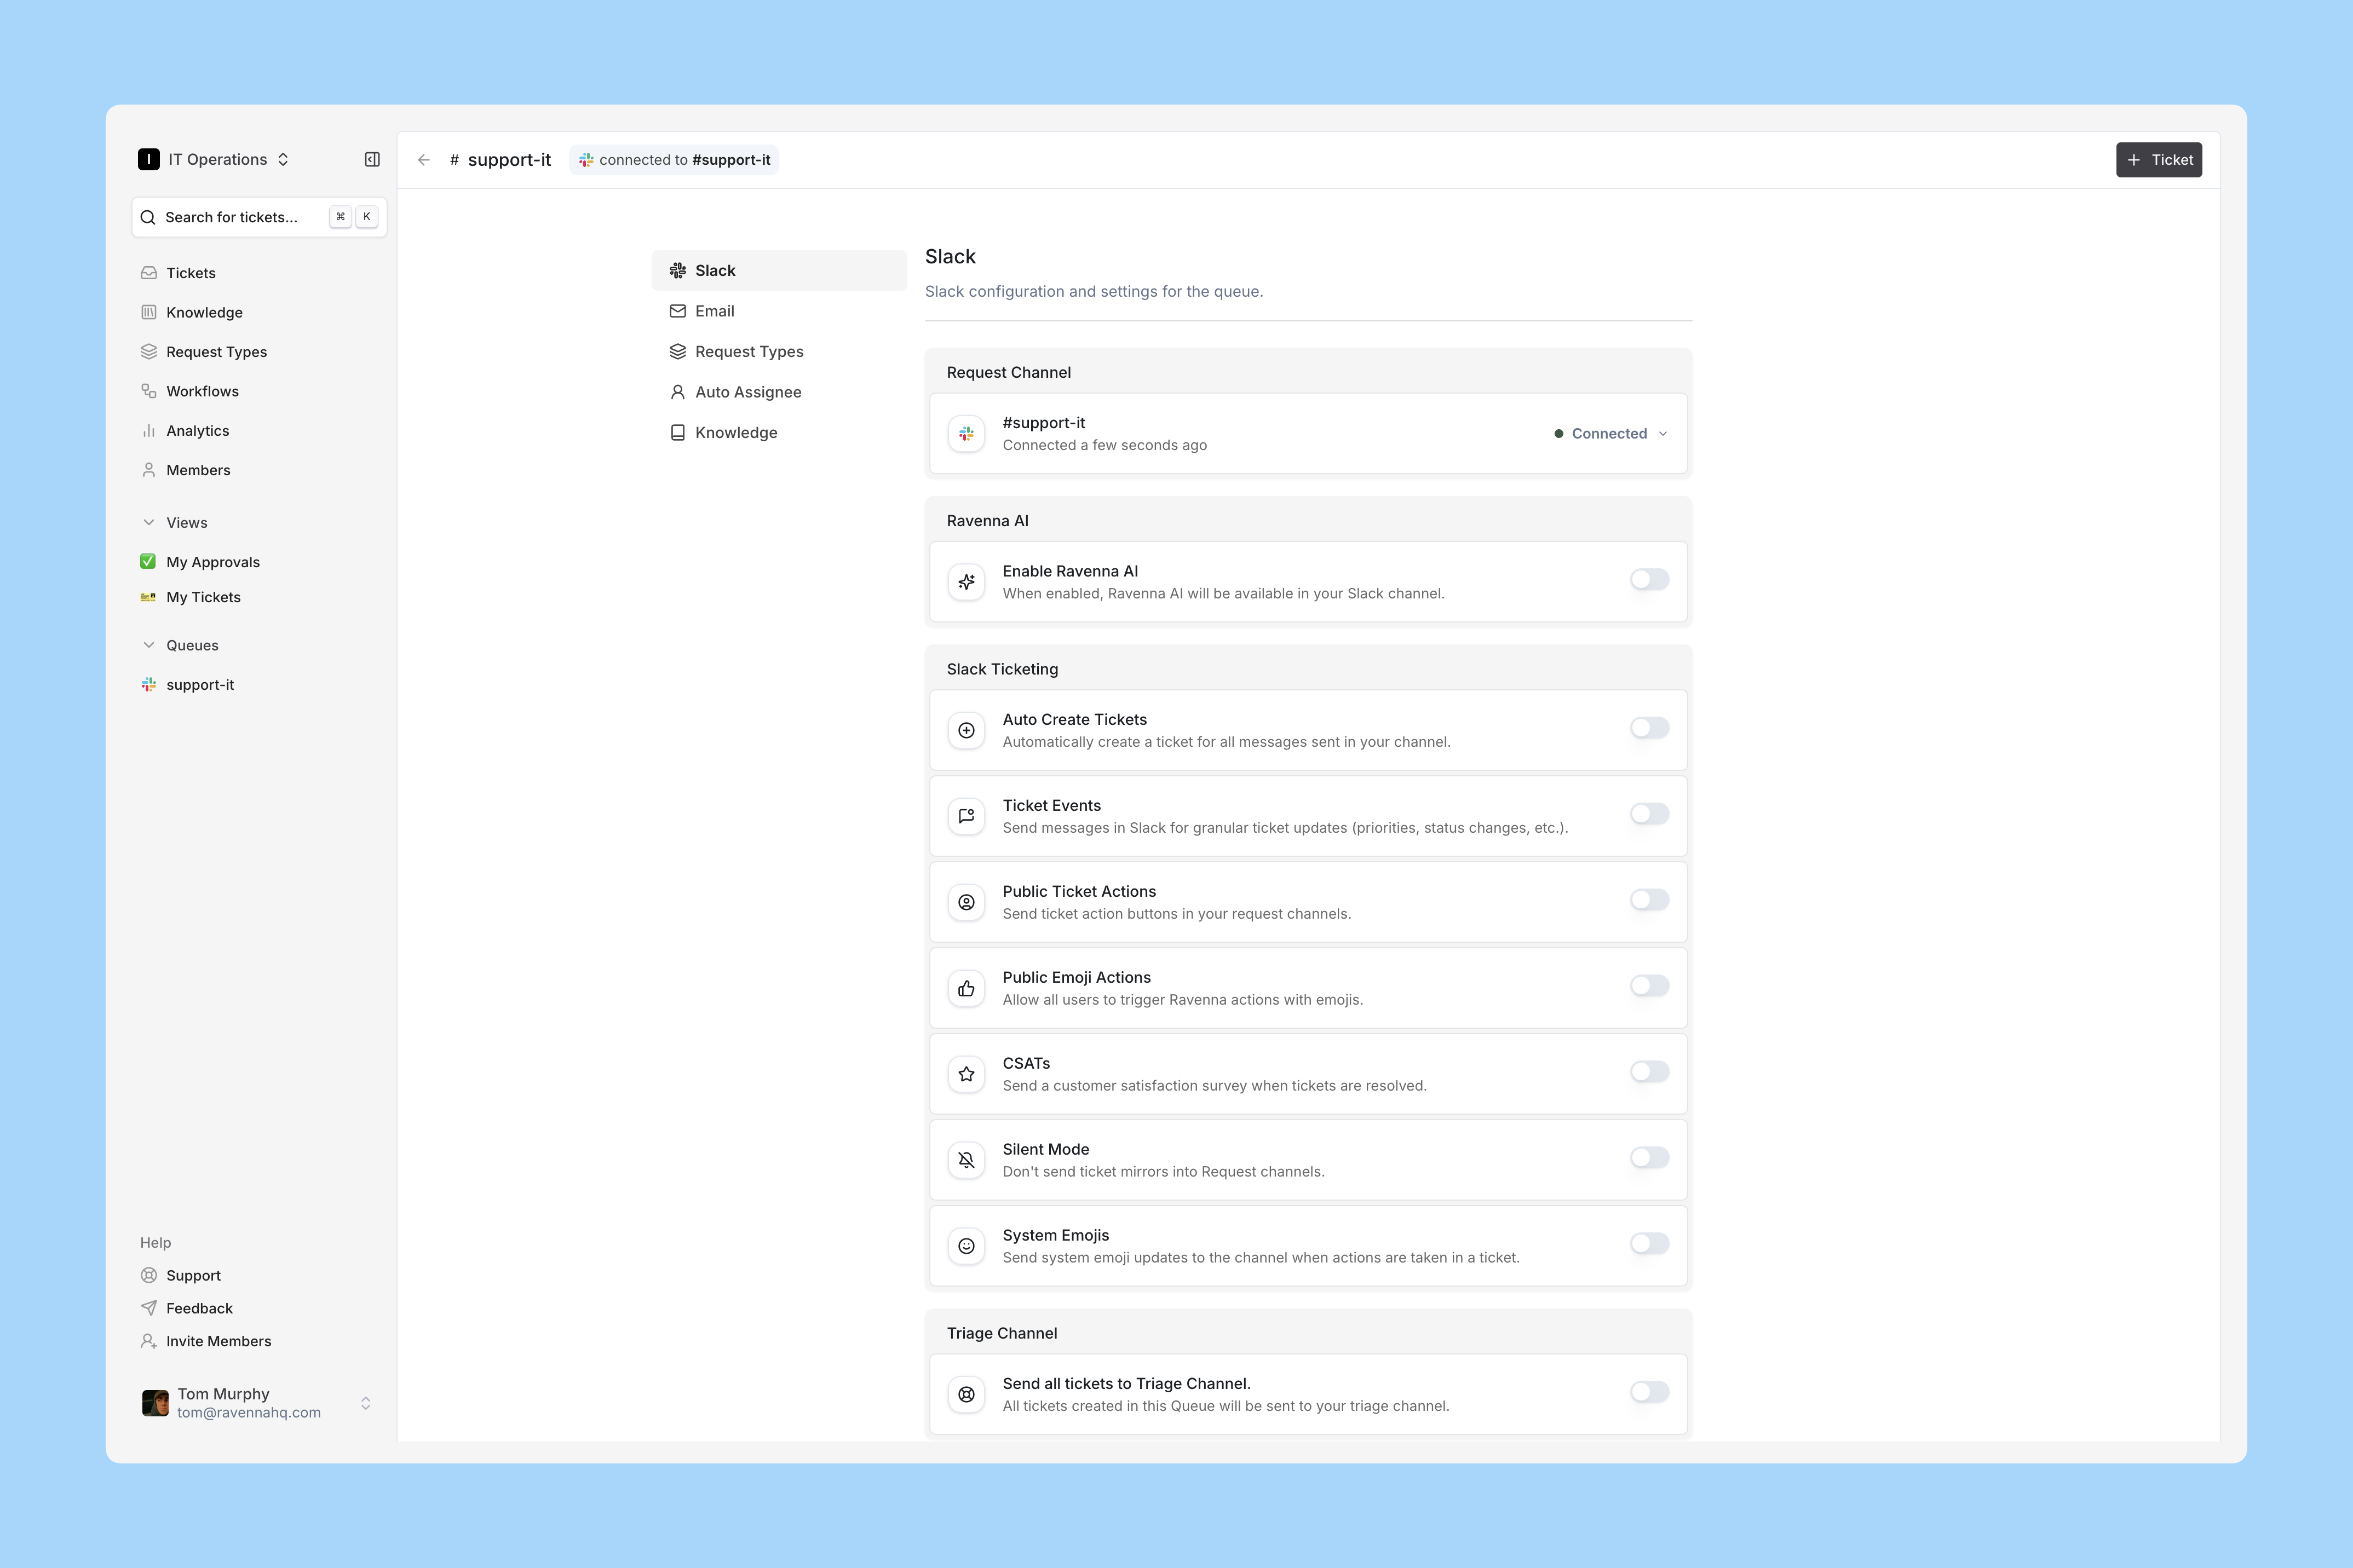
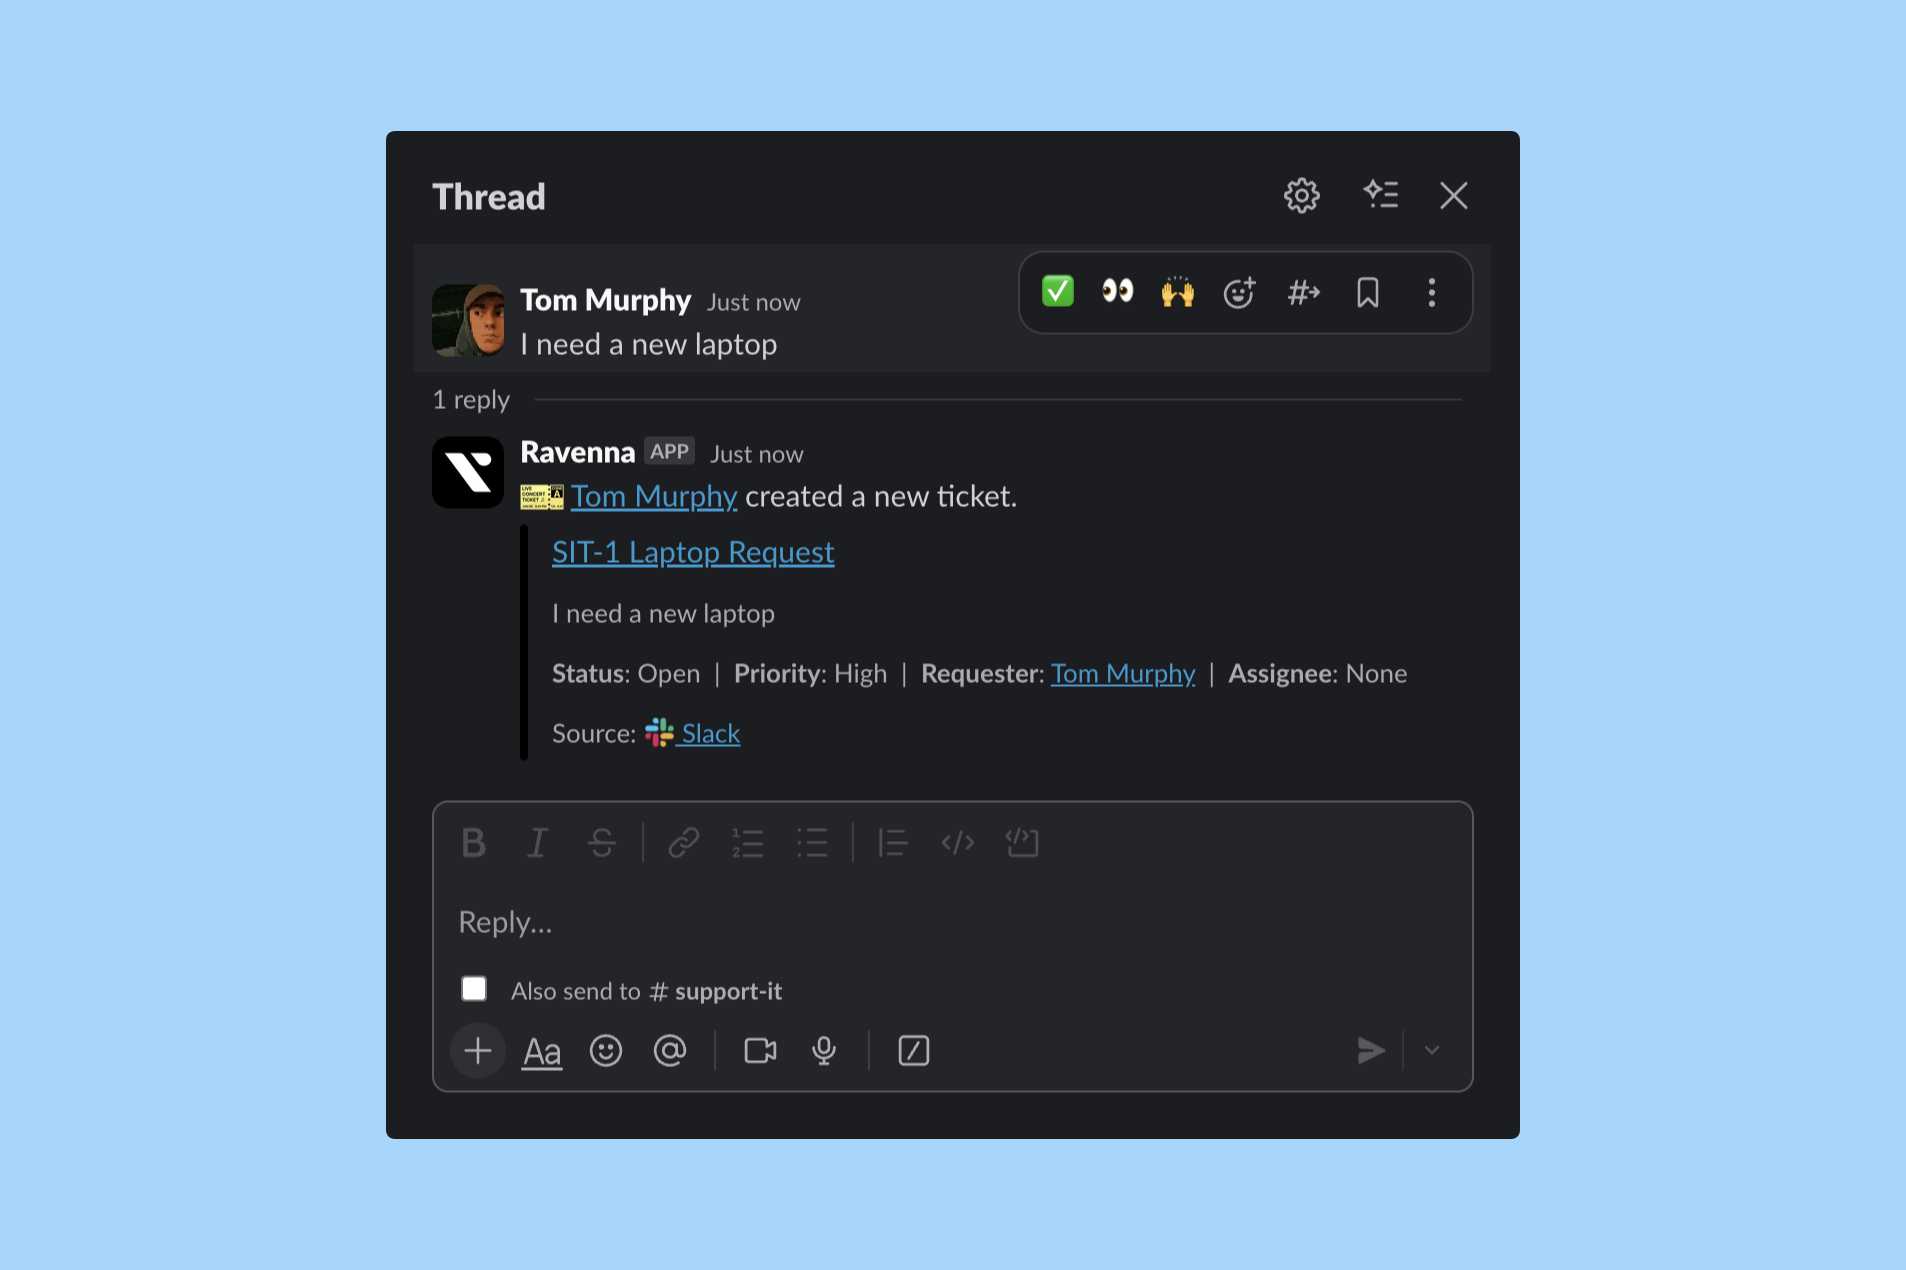
This links the Slack channel to your workspace as a Ravenna channel, and you get a confirmation in Slack.
4
Configure the channel settings
The new channel appears in Ravenna, named after your Slack channel. Open it and click Settings in the top right.
For a typical IT Operations request channel, enable:
Auto-create tickets, so every new message becomes a ticket without anyone reacting to it
Public ticket actions, so responders can act on tickets from the Slack thread
Public emoji actions, so reactions like ✅ change ticket state
CSAT, so requesters get a satisfaction prompt when a ticket resolves
System emojis, so Ravenna signals status changes with reactions
Start with one. Channels are intake surfaces, not work streams. A team with one request channel and a handful of saved views is easier to run than a team with eight channels, because every extra channel is another place a ticket can go unnoticed.